
A quick and easy guide to installing OptiFine 1.19 to your Minecraft launcher and playing with your favourite shaders.
What Is OptiFine and How Does It Work?
OptiFine for 1.19 is like any other version is a mod used to provide the facility to add different shaders that are compatible to give you great looking Minecraft gameplay. Not only does it allow you to add a variety of shaders that you can download for free, but it also helps with performance.
Once OptiFine is installed it gives you more options to help control your Minecraft world. By being able to tweak performance it can give low end devices that extra light so that it runs Minecraft better and gameplay is smoother.
How To Install OptiFine 1.19 To Your Minecraft Launcher
In this article we show you how to download and install OptiFine, we then go through what you need to do to download and install compatible shaders for 1.19.
Video Guide
Written Guide
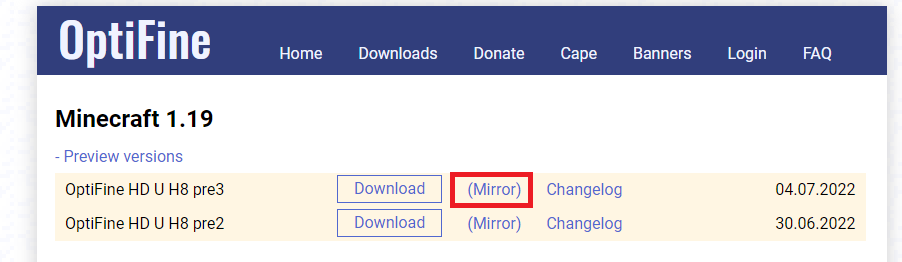
Step 1. Download OptiFine 1.19 from the official website. Use the mirror option for preview 2 (unless there is a more recent release) then press the blue download button on the following page.
Step 2. Double click the downloaded file or right click and open with Java. This will bring up the installation panel. Once opened click Install.

Step 3. OptiFine 1.19 is now installed on your Minecraft launcher and you can find it in the Installations section. Press Play with this installation selected and you can go ahead an play with OptiFine installed on your Minecraft.

Trouble Fixes for OptiFine not opening.
How To Add Shaders To OptiFine
Once OptiFine is installed we need shaders that are compatible with 1.19 so that you can play with the beautiful looking Minecraft graphics you see people using with shaders.

Shaders That Work With 1.19
- BSL Shaders for 1.19
- Silbur’s Vibrant Shaders 1.18 (Compatible with 1.19)
How To Install Shaders To OptiFine
Step 1. Download one of the above shaders or another one that is compatible with 1.19.
Step 2. Open your Minecraft launcher and click on the installations tab on the top, from here click the folder next to the three dots.

Step 3. Scroll down until you locate the Shaderpacks folder, and open it.

Step 4. Now move or paste the shaderpacks download (in the zip file format) in to the shaderpacks folder. Once done you can now close the folder.

Step 5. You can now launch your Minecraft with the OptiFine 1.19 installation selected. You can select your shader in game by pressing.
- Options.
- Video Settings
- Shaders
You then select the shader from the list which you want to use. And then click on done and the shader will change over straight away.
