Lets take a look at how to protect your spawn from griefers in Minecraft bedrock. Unfortunately as hard as you try its hard to stop people logging on and trying to ruin your beautiful spawn in a matter of minutes. So lets find out how to protect our spawn in Bedrock.

Why Protect Your Spawn On A Server or Realm?
Since the start of Minecraft online there have always been what are known as griefers. These are other players that will intentionally or at some point decide to log onto another persons server and try to break all the hard work they have put in to make a spawn.
So for this reason I have decided to make a tutorial to find out all the best ways to add spawn protection to your spawn in Minecraft if its on a server or realm. You can use one or multiple methods listed below to try and make your spawn unbreakable for a Minecraft Bedrock server.
How To Use Spawn Protection In Minecraft Bedrock
There are lots of different ways we can help secure spawn so lets take a look at the list below and find whats the most suitable for you.
Deny, Allow and Border Blocks For Spawn Protection
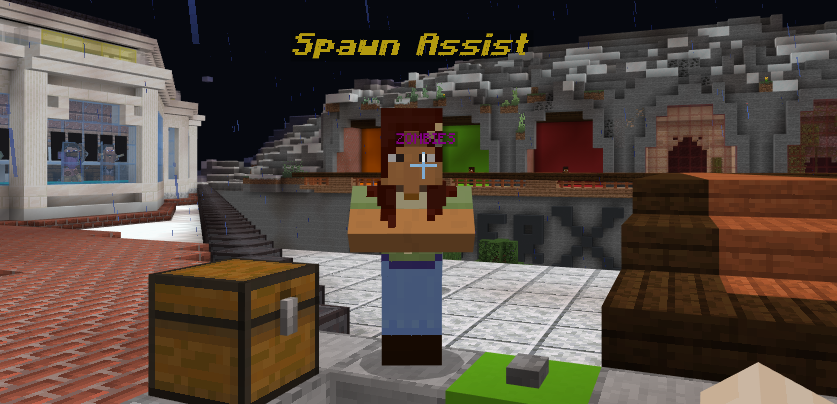
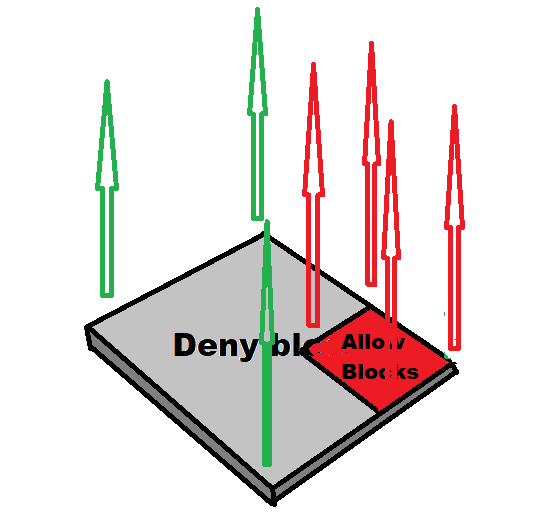
Deny Block
These amazing little blocks brought in a few years ago have changed how much griefers can get away with dramatically. This single block stops anyone breaking or placing any blocks above where they are placed. Meaning that simply building a layer underneath your spawn will do most of the job for you with out even having to type one command in.
So if you put the deny block layer on the bedrock level of the are you want to protect it will protect anything above the area all the way up untill the build limit.
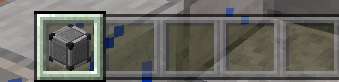
How Do You Get A Deny Block?
To get a deny block and start protecting your spawn in Bedrock simply open the chat and type in /give playername deny 1. For example if my player name is hotdog123 I would type /give hotdog123 deny 1.
You also need to be an op to use these blocks and you can do this by typing into your server console op playername. Once you are an operator you can now sue the blocks and commands.
You can also use @s @a @r @p instead of the player name you want to give a deny block too.
@s means to self
@a means to everyone
@p means to the closest player
@r means to a random player

Allow Blocks
Allow blocks are great to use in conjunction with deny blocks. As allow blocks will allow the player to break or place anything that is ontop of the block, but no the block itself. You might be wandering why there is any need for these then as you can break blocks normally in Minecraft anyway?
Its so you can have areas on top of deny block for you to use. For example I have a spawn but in one area I want players to be able to mine or break a tree or even build in a certain area only. I can do this by having the deny blocks underneath my entire spawn but in the areas I want players to mine, I have placed some allow blocks ontop of the deny blocks allowing the player to build/place blocks from the allow block and upward, but no further down than the allow block and as soon as they go over the edge of the allow block they will be stopped by the deny block again.
Changing Players Gamemode In Spawn
Another way to stop spawn griefing is setting up 2 command blocks that will set your gamemode to adventure within spawn and a second to change you to survival mode once you leave.
This method is tried and tested and works really well as the adventure mode is repeatedly forced upon players so even if they switch to survival it will switch them back within a split second.
Using this method you can create a complete spawn protection in the area of your spawn and then as soon as they leave this area they can go back to normal survival mode automatically.

Setting Up The Ticking Area For Your Commands
Before we set up the command blocks we need to make a ticking area in your world. A ticking area will allow any commands within this area to run through out the entire world. If the command blocks arent in a ticking area then the command will only work for a number of blocks away from the command block itself.
So first find the area you want your commands to run from (keep this a private area and near the middle of your spawn) and then open your chat and type this as a command to create a ticking area where you are stood.

What this command break down to is, your adding a ticking area in the shape of a circle were your stood (~ ~ ~) it goes out 4 chunks from the centre and your calling it spawn
Adding Your Spawn Protection Command Blocks
Step 1. First command block you need to place in your ticking area (in the middle of spawn) is to make everyone go into adventure mode when they enter your spawn area. Do this by adding the following command in the command block.
execute @a[m=s,r=210] ~ ~ ~ gamemode a
An explanation of this command is:
> “execute @a” To execute this at anyone in the world.
> “[m=s” This will now only work for everyone which is in the gamemode of s=survival
> “,r=210]” This will make this work only in the range of 210 blocks (change this to suit your spawn)
> “~ ~ ~” This means it will be executed from the place the command is run from (if command block its there) if you have your ticking area in another place you can run this command by switching the tilda’s (~) to the centre coordinates of your spawn.
> “gamemode a” This will switch everyone which suits the conditions to adventure mode.
Now make sure the command block is set to Repeating, Unconditional and Always Active.
Step 2. Now lets setup the second command block to switch everyone to survival mode as they leave the area.
Put down another command block in your ticking area (preferably in the centre of spawn) and type in this command.

bedrock spawn protection survival modebedrock spawn protection survival mode
An explanation of this command is:
> “execute @a” To execute this at anyone in the world.
> “[m=a” This will now only work for everyone which is in the gamemode of a=adventure
> “,rm=212]” This means it only takes effect in a range minimum of 212 and further ranges but not less than 212 blocks thats why its 2 blocks more than the range. Meaning that the first command blocks switches them to adventure within 210 blocks of the command blocks but anything after 212 blocks will be effected by this command and switch them to adventure.
> “~ ~ ~” This means it will be executed from the place the command is run from (if command block its there) if you have your ticking area in another place you can run this command by switching the tilda’s (~) to the centre coordinates of your spawn.
> “gamemode s” This will switch everyone which suits the conditions to survival mode.
Now make sure the command block is set to Repeating, Unconditional and Always Active.
Anti Creative Mode Command Block
In a similar way to the last method you can also use the same command to stop anyone apart from yourself and other selected players from going in to creative mode.
This can be extremely helpful for any one using toolbox and can change their gamemode illegally. As this is a repeating command even if they switch they will be switched back in a split second.
First setup the ticking area command before you place down your command block so it works through out the whole world.
Now put down a command block and type in the following command (replacing the player names with the ones you want to exclude from this rule.

An explanation of this command is:
> “execute @a” To execute this at anyone in the world.
> “[name=!playername” This will exclude players from this command so if my playername is bob123 it would be: /execute @a[name=!bob123,m=c] ~ ~ ~ gamemode s
Its important to have the exclamation mark (!) before the name as this means to exclude this player from the command. If you have a space in your playername use brackets on either side when adding to command. So bob 123 would be “bob 123” and if you want to exclude multiple players from this command you use a comma and repeat like this.
/execute @a[name=!bob123,name=!gemma321,name=!rogger34,m=c] ~ ~ ~ gamemode s
> “m=c]” This will make sure the command only works for players that are in the gamemode of creative.
> “~ ~ ~” This means it will be executed from the place the command is run from
> “gamemode s” This will switch everyone which suits the conditions to survival mode.
Now make sure the command block is set to Repeating, Unconditional and Always Active.
Conclusion
Protecting your spawn is essential especially after taking so long to set it up for your players to join. Even having some protection will help as it will put of potential griefers as its much easier to grief a server or realm with out protection rather than one that has some.